Your plotter can do more!
You've just got a plotter and are now wondering what you can do with it? Then I have something for you.
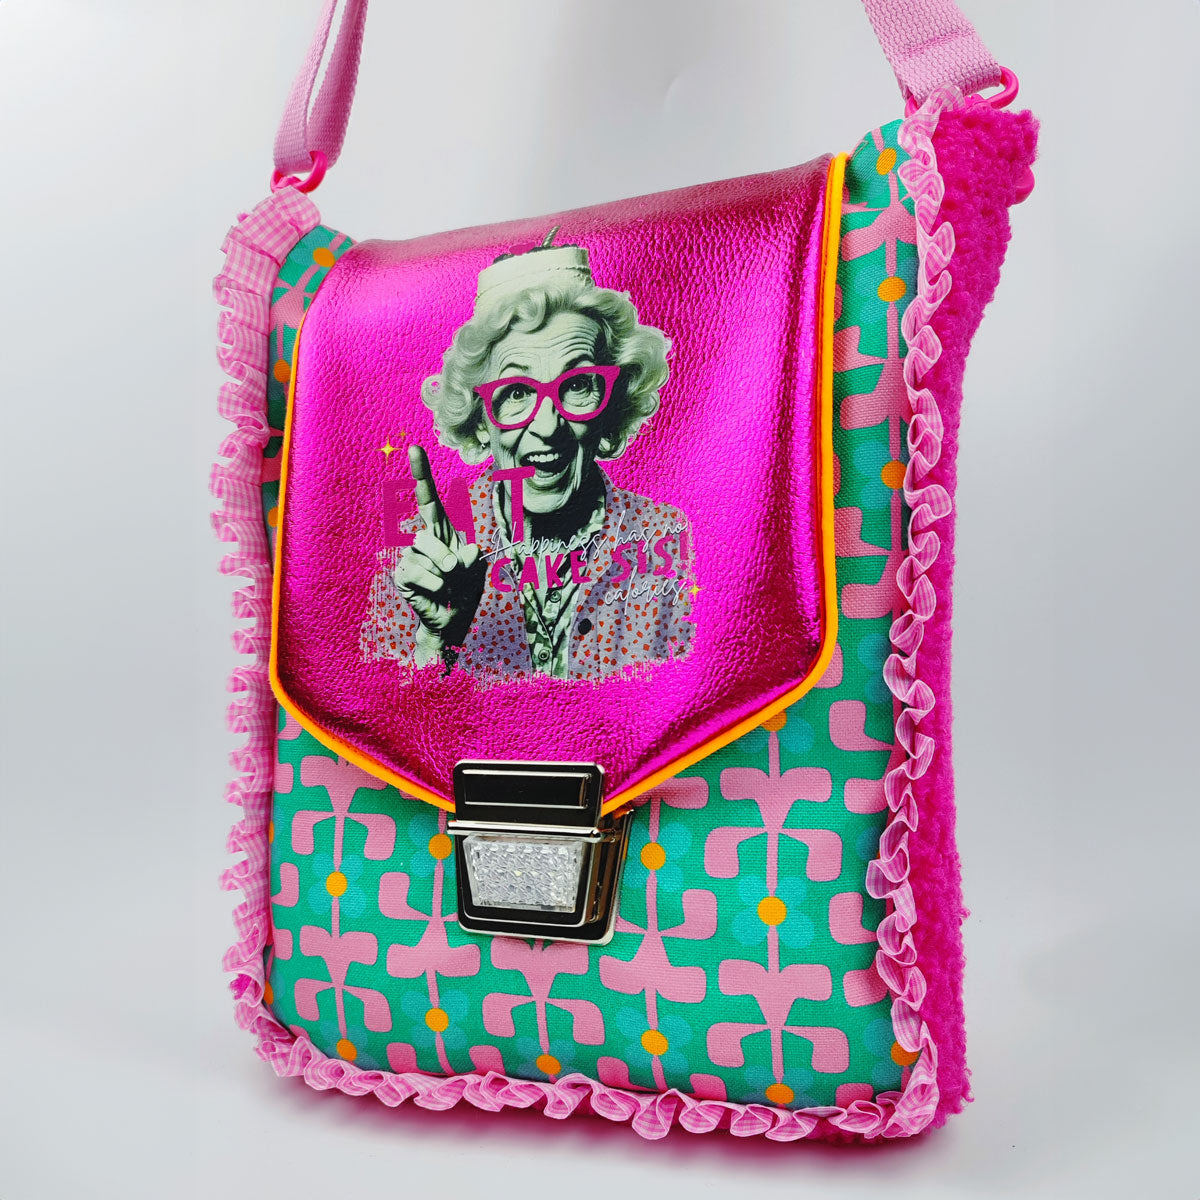
Because even though Instagram may suggest otherwise, your plotter can not only plot lettering, but also really cool motifs. So cool that your self-sewn works cannot be distinguished from purchased motif shirts - apart from the better quality of the fabrics and the seams, of course!
But let’s look at some basics.
Do I need a subscription to Designspace at Cricut or the Silhouette Store?
No. Of course, the subscriptions give you a large selection of designs and fonts that you can use. The designs are kept simple and great for getting started. But you don't necessarily need a subscription. You can also buy the designs quite cheaply in the stores.
What always bothers me a little is that, especially with Cricut, the subscription is constantly displayed, suggesting that I need it to work. In the design space, however, you also have the option of using your system fonts - or you can download fonts for private use from
"Dafont" for example at any time and then use them in the design space.
Where can I buy files for my plotter?
I read this question quite often in plotter groups on Facebook. There are many places where you can buy plotter files. Here is a small overview for you:
• Designspace Cricut/Silhouette Store
•
Makerist
•
Etsy
•
Kasuwa
• Plotter film shops usually also have a download area
• from the designer themselves (incidentally, this is the best option as the designer does not have to pay any fees to a platform)
Which files do I need for my plotter?
This depends entirely on your plotter!
Silhouette plotters can only read DXF in the basic software version. However, since
DXF is quite confusing to work with, I definitely recommend upgrading to a higher software version!
Cricut & Brother plotters work with
SVG and DXF even without an upgrade. SVG files always have preference as they are more precise.
You can read more about the file types here:
https://www.graphicjam.at/plottermotive-dxf-svg-wo-ist-der-unterschied/
PNG & JPG , on the other hand, are image files and not vector files. These files can only be used to a limited extent and you must first create a plotter file from them using the tracing function.
Create plotter files from images
For me, the Silhouette program is clearly the winner here compared to others. With Cricut, you won't get very far without a subscription. However, even if you own a Cricut, you can still use the Silhouette program and prepare your files for the Cricut.
I often see that people want to plot portraits of their dogs. I'll show you here in brief how to do it:
Here you can see it step by step
 Photo by Victor Grabarczyk on Unsplash
The quality of the image is crucial to getting a good result. Your image should be sharp and your main subject should ideally be against a solid-colored background.
I will now show you the tracing function in Silhouette.
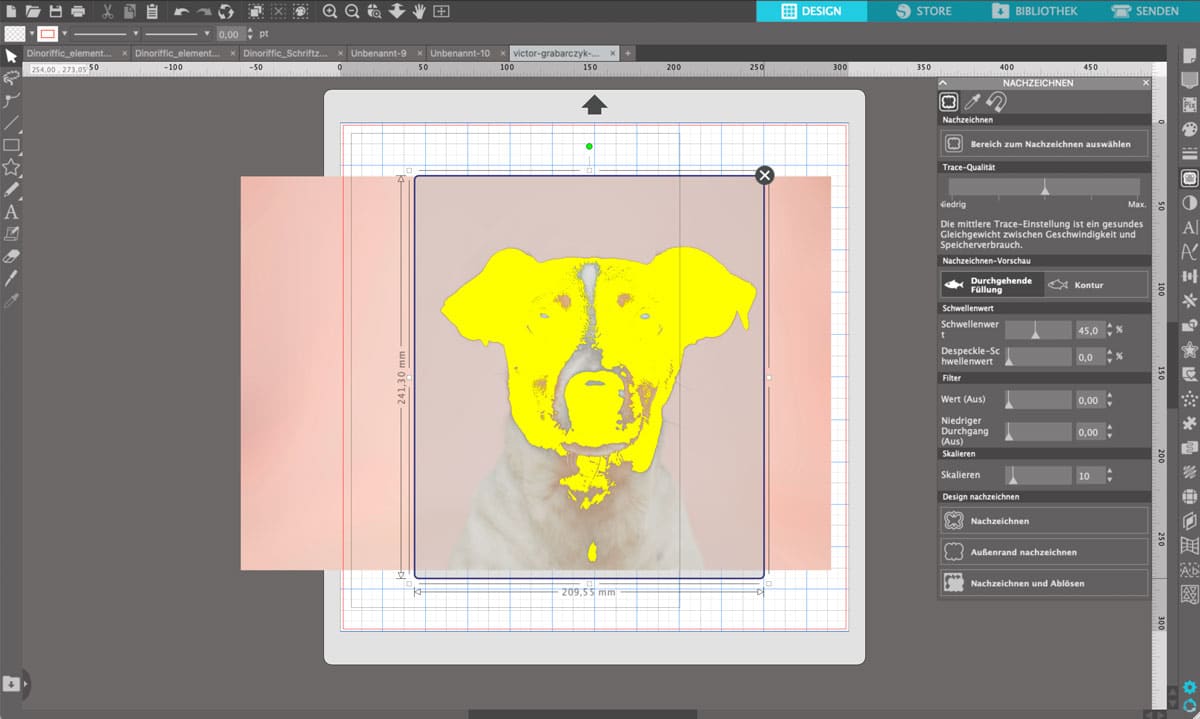
 Image tracing function Silhouette Studio
To use the tracing function, you have to click on the "butterfly" in the right toolbar to open the editing menu. Then mark the area of the photo that you want to trace.
At first glance, the traced image doesn't look like much. That's why you have to play around with the values in the menu on the right. The goal is to have as few details or snippets as possible without losing the dog's character. If you leave too many small details, removing the weeds won't be any fun.
 My ideal values for this example are as follows:
Threshold: 23% & 48%
Filter: 0 & 2.25
Scale: 14
This gives me a fairly large, continuous area that can be easily cut by the plotter.
Now just delete the actual image and send the traced file to the plotter!
Create plotter files from graphics
There is actually a bit of advertising in this part - of course - I create exactly the kind of plotter files that you can use to create your own designs.
I am also a full-time graphic and web designer and create many brochures, advertising materials, etc. for my customers. It is often too time-consuming and laborious to draw everything down to the smallest detail yourself - unless, of course, the customer pays for the time you have to spend on it.
At the end of the day, the finished graphics are often a mixture of purchased elements, fonts and custom-drawn ones.
Because of my job, I started to draw such element sets for use with the plotter, because I noticed that I usually use finished plotter files 1 - 2 times and then unfortunately they gather dust on the PC far too often.
With a "plotter bundle" you have a thematically coordinated toolbox of elements from which you can create your own plot.
My plotter file bundles contain between 29 and 80 elements and lettering that you can ideally combine to create an individual plot. At the moment, you can only get my plotter bundles with a private use license, but each bundle includes a mini commercial license with which you can create 5 plots for your market product. Commercial use is also planned in the future, but this will only come with the new web shop.
In my e-books you will also learn step by step more about the program functions and how to prepare your plots so that every layer of your foil really has contact with your textile.
drawing plotter files
Of course, you can also draw your own plotter files! The easiest way to do this is with an iPad and a pen. I can recommend "
Procreate " as a drawing program.
When drawing, it is important that you work with a separate layer for each color. This makes rework easier.
With Procreate itself, however, you do not create a vector file that your plotter needs, but rather just a pixel graphic. If you then want to use this with your plotter, the easiest option without any additional programs is the "tracing function" described above. If you are good with a PC, you can also vectorize your previously drawn graphics using the free tool "
Inkscape " and thus prepare them for your plotter.
Other tools for vectorization are: Adobe Illustrator or
Affinity Designer
I hope that my post has given you a little overview of the options available to you with your plotter!
In future blog posts I would like to go into a little more detail - it would actually go a little beyond the scope here.
 Photo by Victor Grabarczyk on Unsplash
The quality of the image is crucial to getting a good result. Your image should be sharp and your main subject should ideally be against a solid-colored background.
I will now show you the tracing function in Silhouette.
 Image tracing function Silhouette Studio
To use the tracing function, you have to click on the "butterfly" in the right toolbar to open the editing menu. Then mark the area of the photo that you want to trace.
At first glance, the traced image doesn't look like much. That's why you have to play around with the values in the menu on the right. The goal is to have as few details or snippets as possible without losing the dog's character. If you leave too many small details, removing the weeds won't be any fun.
 My ideal values for this example are as follows:
Threshold: 23% & 48%
Filter: 0 & 2.25
Scale: 14
This gives me a fairly large, continuous area that can be easily cut by the plotter.
Now just delete the actual image and send the traced file to the plotter!


